
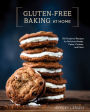

Gluten-Free Baking At Home: 102 Foolproof Recipes for Delicious Breads, Cakes, Cookies, and More
288
Gluten-Free Baking At Home: 102 Foolproof Recipes for Delicious Breads, Cakes, Cookies, and More
288eBook
Related collections and offers
Overview
JAMES BEARD AWARD WINNER • IACP AWARD WINNER
Despite the volume of gluten- and allergen-free baking books on the market, it's still surprisingly difficult to find recipes that work every time. Enter Gluten-Free Baking at Home, a compendium of tried-and-true gluten- and allergen-free baked good recipes that everyone will love. Using customized flour blends, high-quality whole foods, and inventive flavor combinations, these recipes present gluten-free baking at its best. From cookies to cobblers, and quickbreads to muffins, all the beloved bakehouse classics are included, such as Chocolate Chip Cookies, Banana Bread, Brioche, and Biscuits. Using techniques from a long-time gluten-free baking master, you'll learn how to make moist cakes, flakey pies, light and airy yeast breads, and so much more. The recipes are designed to be free of gluten, dairy, soy, nuts, and eggs--with numerous substitutions for each that still achieve wonderful results. Lavishly photographed with step-by-step instructions, this is an indispensable guide to gluten-free baking for everyone.

Product Details
| ISBN-13: | 9780399582806 |
|---|---|
| Publisher: | Clarkson Potter/Ten Speed |
| Publication date: | 09/24/2019 |
| Sold by: | Random House |
| Format: | eBook |
| Pages: | 288 |
| Sales rank: | 950,206 |
| File size: | 255 MB |
| Note: | This product may take a few minutes to download. |
About the Author
Read an Excerpt
Introduction
MY PHILOSOPHY OF ALLERGEN-FREE BAKING
When I first began my journey of becoming a gluten-free baker, I had already been a baker, experienced in experimenting with gluten flours for many years. I had assimilated the visual cues of what wheat flour looked like as dough and what wheat-based batters looked and felt like. What was most striking when I turned to gluten-free baking was how different the process was and how different the doughs and batters sometimes looked. I struggled with this for a long time. I discovered that I couldn’t rely on the instincts that I had internalized over my years of cooking and baking with wheat flour.
Thinking outside the box brought me to a place of success in my gluten-free baking. Sometimes it was a matter of blending techniques and sometimes it was a matter of finding new ways of handling the dough or batter. For instance, I borrowed an ageold technique for building structure in a cake and brought it to my cookie baking— creaming the butter and sugar together and adding the eggs one at a time.
The other striking thing was how wildly the end results varied. I was an experienced baker and yet I was having so many failures. In instances like this, it is easy to give up and stop baking. The ingredients are expensive, and your time is valuable. It is no fun having to throw a baked good out or, worse, having to suffer through eating a subpar sweet because you don’t want to waste anything.
Somewhere along the line, I got frustrated enough to start weighing my ingredients and tracking my experience. It was about this time that I was working as a recipe tester for a gluten-free baking book, and all of the measurements were in cups. I discovered that the only good way to track my results was to weigh all the flours. I was working long-distance with the author, and I wanted her to be able to see exactly what I was doing. She began to weigh the flours as well, and eventually we found a more precise way of handling the testing process. The recipes began to work for both of us.
The other thing that is worth noting here is that the weights in this book are based on the way I was trained to weigh flours: using a spoon, lightly add the flour to the measuring cup, then level off the cup with a straight edge. For every flour in this book, I weighed each flour seven times, totaled the cumulative weight, and divided by seven to get an average. Once I created this standard, I stuck to it through all of my recipe development and testing. I also expected my testers to use the weights that I came up with. This is why my weights will not match the standardized weights that you see on the internet or anywhere else. If you are not going to use the weights in this book, I would suggest that you measure as I do—by measuring the flour lightly (not in packed cups). All of those standardized weights on the internet are based on how someone weighs flour, and we all do it very differently.
Weighing ingredients is a time-honored tradition with all professional bakers, and it is standard in countries that use the metric system. Throughout most of the world, nobody would bake without weighing the ingredients. I started writing all of my recipes only by weighing the ingredients. I developed the recipes in this book with my mother, working long-distance between Montana and San Francisco. I wanted my mother to have the same results that I was having, so I bought her a scale and taught her how to use it. She soon started to love this way of baking: measuring all of the dry ingredients into one bowl. We both agreed it was so much easier and more precise than using cup measures.
My key to successful gluten-free baking is this: buy a scale and weigh your ingredients. I have included the customary units of measure, but I would strongly urge you to weigh the dry ingredients if you want the best results and consistency. Gluten-free baking requires multiple flours, so the chance for error goes up incrementally with each consecutive dry ingredient. Take a look at the tutorial on the opposite page for how to use a scale properly for baking. After getting comfortable with it, you may never go back to the American way of measuring. All of your flours can be weighed in the same bowl simply by hitting the tare button between each flour. Tare weight is the true weight of the ingredients minus the weight of the bowl. You should always place your mixing bowl on the scale first and hit the tare button.
You might wonder why I adhere to customary units of measure when it comes to the smaller amounts: teaspoons and tablespoons. My belief is that most of the inexpensive kitchen scales on the market are not very accurate at measuring weights under 10 grams. More expensive, top-of-the-line scales are great at weighing small quantities, but not everyone needs or wants an expensive scale (see pages 30 and 265 for some recommendations). But remember: the smaller measurements need care as well. The best way to measure a teaspoon or tablespoon is to overfill the measurement, then level it off with an offset spatula, the back of a butter knife, or some other straightedge. Careful measuring is key to making these recipes work.
A note on mix-ins: Although I strongly urge you to weigh the ingredients for a recipe, I don’t provide weights for mix-ins like chocolate, nuts, seeds, and other additions. These types of ingredients affect the recipe’s integrity less than flour does, so it’s okay if your mix-ins are not weighed to precise measurements. Use your regular dry measuring cup and fill it level with the sides.