

Hardcover
-
PICK UP IN STORECheck Availability at Nearby Stores
Available within 2 business hours
Related collections and offers
Overview
Atelier education is centered on the belief that working in a studio, not sitting in the lecture hall, is the best place to learn about art. Every artist needs to learn basic drawing skills.
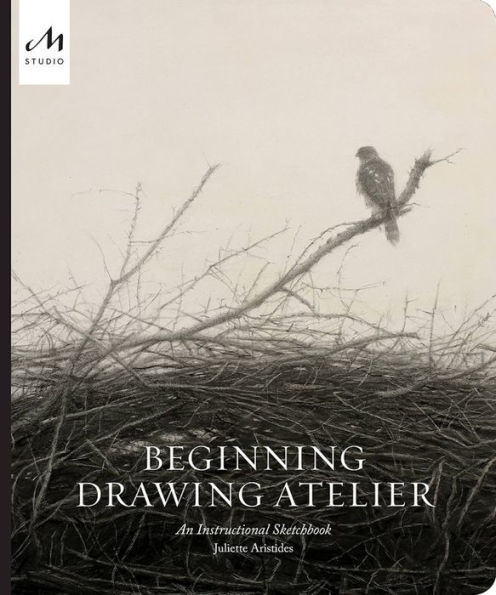
In this elegant and inspiring workbook, master contemporary artist and best selling author Juliette Aristides breaks down the drawing process into small, manageable lessons; presents them progressively; introduces time-tested principles and techniques in the Atelier tradition that are easily accessible; and shares the language and context necessary to understand the artistic process and create superior, well-crafted drawings.
What makes this approach unique is the fact that it includes blank pages for copying and practicing within each lesson, facilitating traditional Atelier methods. Ateliers have produced the greatest artists of all time—and now that educational model is experiencing a renaissance.
These studios, in a return to classical art training, are based on the nineteenth-century model of teaching artists by pairing them with a master artist over a period of years. Students begin by copying masterworks, then gradually progress to painting as their skills develop.
Beginning Drawing Atelier is like having an atelier in a book - and the master is Juliette Aristides, a classically trained artist. On every page, Aristides uses the works of Old Masters and today's most respected realist artists to demonstrate and teach the principles of realist drawing and painting, taking students step by step through the learning curve yet allowing them to work at their own pace. Unique and inspiring, the approach in this new book offers serious art courses for serious art students.

Product Details
| ISBN-13: | 9781580935128 |
|---|---|
| Publisher: | The Monacelli Press |
| Publication date: | 04/16/2019 |
| Pages: | 128 |
| Sales rank: | 174,679 |
| Product dimensions: | 7.70(w) x 9.10(h) x 0.70(d) |
About the Author
Aristides is also the best-selling author of Classical Drawing Atelier, Classical Painting Atelier, Lessons in Classical Drawing, Lessons in Classical Painting, and Figure Drawing Atelier (September 2019). Visit her website at AristidesArts.com. She is based in Seattle, Washington.
Read an Excerpt
CHAPTER ONE
LINE
It was the habit of Apelles not to allow a day to be so full that he had no time to practice his art by drawing a line.
PLINY THE ELDER, NATURAL HISTORY
We start at the beginning: the line.
When you sign your name at the end of a letter, the writing is forceful and clear. It isn’t shaky and scratchy, because you are working with purpose. Your mind and hand know what to do. Yet none of us start life knowing how to write; it is a skill acquired over time, requiring both instruction and practice. The building blocks of drawing are no different from those of learning the letters of the alphabet. I remember practicing letters over and over to get uniform sizes and spacing, neatness, and control. I remember my frustrated parents wondering if I would ever get the hang of it. Now, of course, penmanship comes without thinking. The same potential exists in drawing. Confidence comes on the far side of instruction and practice; everyone who can write his or her name has the capacity.
DRAW LETTERS
Some early American drawing books taught handwriting along with drawing. The same lines used for letters are also used for drawing pictures. Use a soft, dull pencil to re-create these lines and letterforms by Ellen Sontra. Press hard for the downstroke and light for the upstroke to get a real difference in line thickness. Go slowly and steadily. Great letters are made with deliberation.
DRAW LINES
Just as when practicing your ABCs, we start with simple line directions without worrying about forming words right away. Be goal oriented: when placing a line, determine where you want the line to end (rather than focusing on the tip of your pencil) and move there directly with intention.
Place the tip of your pencil on a dot and draw a line down to its partner dot. Feel how confidently your pencil moves from dot to dot. This is how you should feel when working on your drawings. Multiple thin lines—placed lightly, with the confidence of knowing any line can be adjusted later—are better than a thick, trembly line anxiously drawn. Keep your lines light so they erase easily. Don’t be discouraged if this task is harder than it looks; do the exercise without judging your efforts.
Let your line start forcefully, then allow it to get lighter, fading gradually as it slides over the end dot. Trust that the line is correct and don’t second-guess it. Practice making a range of assertive lines: verticals, horizontals, and semicircles.
Finding Design through Governing Lines
A great drawing always starts with an emotional response to your subject. Look past the details and likeness and, instead, focus on your subject’s hidden essential patterns and structure. Often, this is no more than a single repeating line direction, or just a few dynamic angles, but the result is like a storyline that summarizes a whole book. You can actually draw these lines in your image, or just keep them in your mind, allowing them to subtly influence your drawing as it develops.
FIND GOVERNING LINES
Most master drawings have a theme built on simple lines. In the subsequent drawings, we are going to find the role of vertical, horizontal, and diagonal lines.
First, draw directly over the John Ruskin drawing, opposite, to see how many vertical lines you can find. Make your lines long, running each line past where you see it start and end. Next, look for horizontal lines. Draw them across the page—big lines, not tiny dashes—to see what else each one hits. Lastly, do you see any semicircles? Are you surprised how much of this complex-looking drawing was created by only three line directions?
Line directions are letters in the draftsperson’s alphabet. When one direction is emphasized or used in combination with others, rhythm and design are created. The diagonal line conveys motion and instability; its movement defies the pull of gravity. Théodore Géricault chose the diagonal to use throughout his drawing, shown opposite, to express the dynamic force of horses in motion.
In his book Art and Visual Perception, Rudolf Arnheim, a perceptual psychologist working in the twentieth century, asked us to consider a line as directed tension. “Think of a rope that is motionless while two men of equal strength are pulling it in opposite directions,” he wrote. “It is still, but loaded with energy.” A confident diagonal line conveys this tension, like a tightly pulled rubber band ready to release.
Practice drawing diagonal lines below, connecting the dots as shown. Let your pencil rest on the first point before aiming for the second. Then, sketch as many repeating diagonal lines as you can find on the slightly faded, ghosted version of Géricault’s horses, opposite. Wherever you see a line, draw it long to see how it informs the drawing.
Practice drawing curved lines below, connecting the dots as shown. Then, in the Kenyon Cox drawing, opposite, look for the big sweeping “C.” This graceful line connects diverse elements of the piece, bringing unity to a drawing that might otherwise feel fragmented. Sketch on top of the ghosted version wherever you see this line of movement.
Using Adolf von Menzel’s drawing of rooftops, below, sketch as many repeating diagonal, vertical, and horizontal lines as you can find. See how artists play with a few line directions to create repetition and complexity.
IN THE STUDIO
In the drawing below, Leonardo da Vinci explores proportions and relationships within the human head. These lines are not random; da Vinci mapped a web of connections made by vertical, horizontal, and diagonal lines. Lightly trace each line, noticing all the elements connected along its course. The fewer angles used, the more unified and compelling the portrait. The practice of limiting your line directions is not only good design; it also allows the artist to cross-check for accuracy.
Re-create da Vinci’s drawing by filling in this face with the missing lines. First, place the three horizontal lines across the brow and under the nose and mouth. Next, find the vertical lines, starting with the centerline of the face. Drop more vertical lines from the eyes down the face, even running a few through the neck. Lastly, find the diagonals, such as from the corner of the eyes through the nose and the corner of the mouth. When you’re finished, look at the face of a friend or your own face in the mirror. Can you find similar relationships?
TWO
SHAPE
Looking closely at nature, the first insight we obtain is that, behind the apparently endless proliferation of natural objects, there is a far lesser number of apparently fixed types.
—MICHAEL S. SCHNEIDER, A BEGINNER’S GUIDE TO CONSTRUCTING THE UNIVERSE
We start our drawings when the tip of our pencil pressses against the paper and makes a point. A line forms when we connect one point to another and move our pencil in a direction. As we place multiple lines, they join together, connecting to form a shape. In this chapter, we'll practice seeing shapes and then using them to start our drawings with a technique called blocking in.
I heard that the writer Bertrand Russell dictated his books so eloquently that his first thought became the final word. More common are writers like me, who roughly map a book, develop an outline, and then write increasingly refined drafts. In drawing, the likelihood of creating an image perfectly on the first try is as uncommon as writing a book without corrections. Experienced artists often work like writers, starting with a general sketch of ideas and refining them over time. And in drawing, the first step of this process is the block-in.
Learning to See Shape
To start, let’s take a look at how we see shape. It is common for beginning art students to fall into ways of seeing that are symbolic and imagined, rather than actually observed. To test this, sketch a leaf and a fish on a piece of scrap paper. Are you finished? When drawing these objects, you didn’t need them right in front of you because your mind conjured a picture. Yet the skills that enable us to quickly link names to objects—so essential in life—are a liability in drawing. Our drawings from imagination often stand in for “any leaf ” or “any fish,” rather than one in particular. This type of symbolism may work well for airport signage, but not so well for capturing the beauty of nature in art.
Beginning students inadvertently bring this symbolic seeing into their drawings. They draw an outline of an eye even if part of the eye is obscured, four legs of a table even if only two are visible, or an ellipse for a cup even if the cup is seen at eye level. Objects in real life are often concealed, incomplete, and presented in unexpected views; they rarely look anything like the symbolic versions of themselves. In life, we see every variation of a fish, or a leaf, in various colors, shapes, sizes, vantage points, and kinds of light. So in order to capture objects in real life, we must break away from symbolic seeing. We must focus on an object’s shape, rather than what an object is. Focusing on an object’s name or function leads to mere symbolism, while slow observation of an object’s shape leads to renewed seeing.
Balancing Universal and Particular Shapes
Renaissance artists believed the natural world was the handiwork of God and could be mined for secrets to the universe. They, like the ancient Greeks before them, studied nature to uncover its hidden geometric underpinning and design and then used these patterns and ratios in their art and architecture.
In contrast to reducing objects to symbols, there is a long history in art of studying people, plants, and animals to understand their universal qualities. Every object has qualities that are common to its type, while also being unique. For example, each cat is unique, yet also shares traits with other cats that make them different from birds or trees. Every person’s skeleton shares common markers, yet every person is individual. This is a balance of universals and particulars—between the ideal forms, which we sense, and the imperfect ones we see.
In this section, we are going to channel our inner Renaissance artist to look for simple shapes in everyday items and then adjust them into more complex realistic forms.
IN THE STUDIO
FIND SHAPES IN NATURAL FORMS
Let’s see if we can find simple shapes—the circle, triangle, square, oval, and pentagon—in depictions of common natural subjects.
1. Many flowering fruit trees, leaves, and other natural forms have at their essence the pentagon or pentagram.Find the pentagon in this spicture and lightly sketch it over the image.
Joel Hoefnagel, Detail of Speckled Wood, Talewort, Garden Pea, and Lantern Plant (detail), 1561–62, watercolor, 6 9⁄16 x 4 7⁄8 inches (16.6 x 12.4 cm), J. Paul Getty Museum
2. The square and other four-sided shapes can be found throughout nature in flowers such as dogwood. Find the square and lightly sketch it over the image.
Joel Hoefnagel, Reed Grass, French Rose, Toad, and Gillyflower (detail), 1561–62, watercolor, 6 9⁄16 x 4 7⁄8 inches (16.6 x 12.4 cm), J. Paul Getty Museum
3. The triangle has strength and stability. You can see it in the pointy faces of cats as well as in fruit, birds, and planes. Find the triangle and lightly sketch it over the image.
William Henry Prestele, Fragaria (detail), 1892, watercolor, size unknown, U.S. Department of Agriculture Pomological Watercolor Collection, Rare and Special Collections, National Agricultural Library
4. Find the hidden geometric framework in this drawing of insects and berries. Can you find the semicircle? Find as many triangles, circles, and ovals as you can and lightly sketch them over the image.
Jan van Kessel II, Butterfly, Caterpillar, Moth, Insects, and Currants, ca. 1650–55, gouache and brown ink over underdrawing in metalpoint on vellum, 5 1⁄8 x 6 11⁄16 inches (13 x 17 cm), J. Paul Getty Museum
IN THE STUDIO
FIND A PENTAGRAM IN A LEAF
In this exercise, you will draw a star directly over the leaf opposite using the steps below. The goal here is to see and draw the essential pentagram (star) shape of a leaf, noticing that while all five-pointed (or pentagonal) leaves share the same underlying form, each is also unique. For this reason, some of our pentagons are fat, as on this page, while others are thin.
1. Very lightly draw a box snugly around the leaf.
2. Find the center by lightly drawing an X from the corners and dropping a vertical line through the middle point.
3. Mark where each leaf tip touches the box.
4. Connect all five points, making a pentagram.
DRAW FRUIT WITHIN A SHAPE
Let’s explore the relationship between simple shapes and more subtle forms found in nature. For the images below and opposite, start by lightly drawing the outlining shape of a circle or triangle. Then sketch the leaf or fruit within it, taking care to notice how the natural object differs from the geometric shape.
Deborah Griscom Passmore, Prunus persica, 1905, watercolor on paper, size unknown, U.S. Department of Agriculture Pomological Watercolor Collection, Rare and Special Collections, National Agricultural Library
Royal Charles Steadman, Vitis (detail), 1934, watercolor on paper, 8 3⁄5 x 10 3⁄5 inches (22 x 27 cm), U.S. Department of Agriculture Pomological Watercolor Collection, Rare and Special Collections, National Agricultural Library
Ellen Isham Schutt, Fragaria, 1931, watercolor on paper, size unknown, U.S. Department of Agriculture Pomological Watercolor Collection, Rare and Special Collections, National Agricultural Library
Amanda Almira Newton, Pyrus communis, 1913, watercolor on paper, size unknown, U.S. Department of Agriculture Pomological Watercolor Collection, Rare and Special Collections, National Agricultural Library
USE A UNIVERSAL SHAPE TO RE-CREATE A DRAWING
Find the dominant shape in this drawing of a cat and sketch it at the same size on the blank page opposite. Then use the shape as a guide to capture the cat’s unique qualities.
Anna Egrova, Untitled, 2013, graphite on paper, 7 4⁄5 x 7 4⁄5 inches (20 x 20 cm)
Table of Contents
Opening1: LINE
2: SHAPE
3: VOLUME
4: VALUE
5: FORM
6: PORTRAITS
Closing
Acknowledgments
Index
About the Author
Related Subjects
Customer Reviews
Explore More Items


