


The Year of Cozy: 125 Recipes, Crafts, and Other Homemade Adventures
272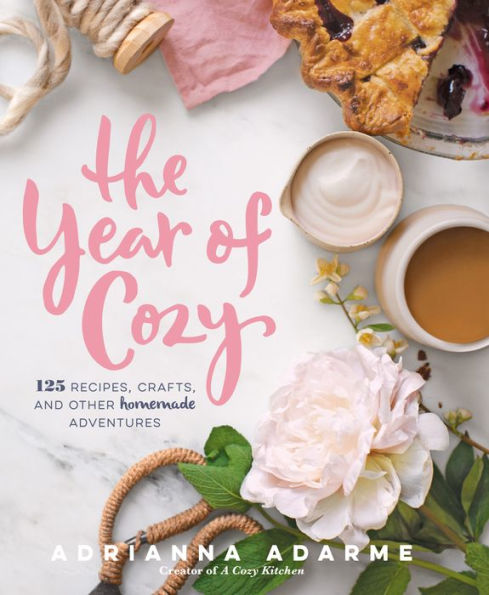
The Year of Cozy: 125 Recipes, Crafts, and Other Homemade Adventures
272eBook
Related collections and offers
Overview
You’ll love Adrianna Adarme’s easy-to-follow instructions and will enjoy getting lost in her warm and comforting photographs. Organized by the months of the year and by categories as “Live,” “Do,” and “Make, ” this book offers ideas for activities, recipes, and DIY projects that make the little moments in life just as exciting as the big. Adarme gives us special (but totally doable) things we can do for others and ourselves.
From quick recipes to easy crafts, she focuses on simple, inexpensive undertakings that have a big reward: happiness. The Year of Cozy will surely inspire you to march into your kitchen and craft closet to make something you can truly be proud of.

Product Details
| ISBN-13: | 9781623365110 |
|---|---|
| Publisher: | Harmony/Rodale |
| Publication date: | 10/06/2015 |
| Sold by: | Random House |
| Format: | eBook |
| Pages: | 272 |
| File size: | 48 MB |
| Note: | This product may take a few minutes to download. |
About the Author
Read an Excerpt
GO ON A FALL PICNIC
Autumn is my absolute favorite time to be outside. There's little to no sweating, and mosquitoes aren't flying around. And the leaves, oh, the leaves! Autumn is, hands down, the best season to pack up some lunch and sit on a blanket in nature. I don't like to make it too much of a production. In order to cut the work down, I embrace the idea of half store- bought, half homemade. This means I buy cheeses, charcuterie, bread, and wine but make a fall salad and dessert at home.
My favorite fall salad is as simple as can be. I like to mix a bit of lemon juice and olive oil in a mixing bowl. Then I add a few pinches of salt and pepper. I like to add fresh herbs like Italian parsley and dill, and slices of fall fruit like Fuyu persimmons and/or apples. Pomegranate seeds add some nice color and texture.
My favorite on-the-go dessert is an apple galette. I like to slice up 2 Honeycrisp apples and toss them with 1 teaspoon of cinnamon and 1/2 cup of brown sugar and a squeeze of lemon juice. I roll out a single piecrust (see page 162), arrange the apples in the center, fold over the edges of the piecrust, brush the dough with an egg wash, and bake at 350°F for 30 minutes, or until golden brown.
GRAIN-FREE DOGGIE DOUGHNUTS
A dog turning a year older should always be an event. You don't have to make it a full-on party (doggie parties can get strange very quickly--trust me, I know), but I do think a small celebration of doughnuts and a candle is fun for the soul. Amelia hates talking about her age, so let's just say she turned 1. Again. MAKES 1 DOZEN
2 cups chickpea flour
1 teaspoon baking soda
1/2 cup natural creamy peanut butter (stir to incorporate any oil on top)
2 tablespoons honey
3 tablespoons melted coconut oil
2 large eggs
1/2 cup water
1 cup shredded apples (about 2 apples, peeled)
1 Preheat the oven to 325°F. Coat a doughnut pan liberally with cooking spray. In a medium bowl, whisk together the flour and baking soda. Add the peanut butter, honey, oil, eggs, and water. Mix until completely combined and then fold in the shredded apples.
2 Divide half the dough among the 6 cavities in the doughnut pan. Transfer to the oven to bake for 10 to 12 minutes, or until the doughnuts are lightly golden brown and spring back when touched.
3 To remove from the pan, run a butter knife along the inside and outside edges of the doughnuts. Place a wire rack on top of the doughnuts and flip it over, inverting the doughnuts. Repeat the process of spraying the pan, filling it up with the remaining batter, and baking it. Doughnuts will keep for 3 to 5 days when stored in an airtight container at room temperature.
HOMEMADE CANDLES
I have a bit of an obsession with candles. I'm not sure when it became en vogue to buy fancy candles, but I jumped on that bandwagon very quickly. I love them all: girly and floral, woodsy, musty, and spicy. And unfortunately for me, I love to burn these pricey candles all the time! So to curtail my expensive candle-buying habit, I figured it might be time I begin making them at home. At this time of year I love candles to smell like pine needles and cinnamon. It's in anticipation of what's to come. Feel free to customize them according to your liking--there's no wrong way to make candles. The ratios below will give you something that smells like the air a few days before Christmas. If you like, double the batch and have them ready for those last-minute gifts that often come in handy this time of year. MAKES 4
SUPPLIES
4 candlewicks
4 (1/2-cup) vessels of choice (glass jars or ceramic pots)
8 skewers
11/2 cups soy wax or beeswax pellets
Candle-making pot or double boiler
1 tablespoon cedarwood essential oil
4 drops lime essential oil
Tip: All of these candle-making supplies can be found at a craft store and online. The essential oils are easy to find at Whole Foods or other health food stores.
1 To start, set 1 wick in the center of each of the vessels.
2 Rest the skewers closely on both sides of the wicks. When we pour in the hot wax, the wicks will want to move around a bit and these skewers will help stabilize them.
3 Add the wax to your candle-making pot or double boiler top. (You can create a makeshift double boiler by placing a stainless steel bowl over a large pot filled with a few inches of water.) Turn the flame to medium.
4 Heat the wax until melted, about 6 to 8 minutes, being sure not to overheat, which will cause cracking in the final product (if this does happen, not to worry--the candle will still smell delicious and work just fine). When the wax is melted, pour in the cedarwood essential oil and lime essential oil. Mix. Give it a whiff and add a bit more if you like. Pour the hot wax into each of the vessels.
5 Allow the wax to cool completely, 2 to 4 hours, before using the candles.
BURNT BUTTER-PEAR-GINGER CRUMBLE
I love when I can feel fall creeping in. The nights become a bit chillier, the sun begins to set a little earlier, and the light takes on a golden quality. This feeling always makes me want to run to my oven to bake. This crumble will warm your house with all of the smells of the season.
The butter in this crumble is burnt, not browned. Burnt. I learned to burn my butter from my friend and baker, Hourie. She always takes the butter a bit too far, and it pays off in the flavor department. The spice from the fresh ginger and sweetness from the baked pears make you feel all cozy inside. And since I'm a crazy fan of icy and hot combinations, I say this must, must be eaten with a scoop of vanilla ice cream. MAKES 4 TO 6 SERVINGS
FILLING
3-4 baking pears, peeled, cored, and finely chopped (see note)
1/4 cup granulated sugar
1/4 cup brown sugar
1 tablespoon all-purpose flour
1/2" knob peeled fresh ginger, finely chopped
1 teaspoon pure vanilla extract
1/4 teaspoon salt
CRUMBLE TOPPING
1 cup all-purpose flour
1/3 cup granulated sugar
1/4 cup oat flakes
1/2 cup coarsely chopped walnuts
1/2 cup unsalted butter, cubed
1 To make the filling: Preheat the oven to 350°F. No need to dirty a bowl: In an 8" x 8" baking dish, combine the pears, sugars, flour, ginger, vanilla, and salt. Toss until the pears are thoroughly coated. Set aside.
2 To make the topping: In a medium bowl, whisk together the flour, sugar, oat flakes, and walnuts.
3 In a small saucepan set over medium-high heat, add the cubed butter. Brown the butter until it goes from yellow and bubbling to a very, very dark brown color. It might appear burnt (and it is), but not to worry, it'll taste delicious.
4 Pour the burnt butter into the medium bowl that's holding the flour and oat mixture. Using a spoon, stir the mixture until it's clumpy and everything is coated in butter.
5 Pour the crumble atop the filling and spread it out evenly. Transfer to the oven to bake for 35 to 40 minutes, or until the crumble is bubbling and the top is golden brown.
Note: The best pears for baking are Boscs, Bartletts, green or red Anjous, or Forelles. All hold up nicely in the oven.
MARBLED BOWLS
It's no big secret that I love marble, actual natural marble. The lines and variances of shapes are so beautiful. Last Christmas, I took my obsession with marble into the kitchen when I made a cranberry-marbled cheesecake for my blog. And now, I'm taking it into my craft closet with these marbled bowls. If you're like me and have bottles of nail polish just sitting in your bathroom, then this DIY is perfect for you. This technique of marbling with nail polish can be applied to a variety of vessels like vases, mugs, and ramekins.
A few tips to keep in mind before you start:
Get everything prepped and then move quickly. The nail polish dries in the water very fast!
Use hot water. Cold water will make the nail polish seize.
Pour the nail polish close to the surface of the water. If you pour it from too high a distance, it will bead up and sink to the bottom.
Pour the 2 nail polishes at the same time.
If on the first try you don't succeed, don't worry. Remember that nail polish remover is your friend, if you need to start again.
SUPPLIES
Shallow container such as a pie pan (I used a shallow baking dish)
Gray nail polish
Mint green nail polish
Skewer
White bowls (see note)
Craft paper or old newspaper
Note: Do not use any vessel that is unglazed. I used very inexpensive white CorningWare bowls that I purchased from Target in the sale section. These bowls work very well because they are high gloss, which means that the nail polish rubs off very easily with a bit of nail polish remover. I also recommend using white bowls so the nail polish colors pop.
1 Fill the shallow container with hot water.
2 Open the 2 nail polishes and hold them close to the surface of the water. Pour them into the water at the same time.
3 Moving quickly, run the skewer through the center, creating a swirl effect.
4 Dip the sides of a bowl into the water. In order to get swirls all the way around, you'll need to repeat with fresh water and nail polish. If any nail polish has seeped into the center of the bowl, remove it using nail polish remover and a cotton ball. Repeat with the rest of the bowls. Place the bowls on a sheet of craft paper or old newspaper to dry for 5 hours.
5 Once the bowls are completely dry, remove any excess nail polish on the bottoms of the bowls or around the rim. Wash the insides of the bowls thoroughly with soap and water. These bowls are food safe (as long as there is no nail polish inside them) and should be strictly hand-washed.
Tip: The container that held the water and nail polish mixture will have some bits of nail polish on the sides and the bottom. I removed the nail polish with a cotton ball and nail polish remover and washed the container thoroughly with hot water and soap.
PEANUT BUTTER CUPS
Amelia is my spirit animal. We are sometimes cranky and bossy, usually lovable, optimistic at the core, and we both love, love peanut butter. There have been moments when she and I have lain in bed together eating apple slices dipped in peanut butter. They weren't our highest moments, but it happened and we've moved on. When it comes to Halloween, Amelia and I are lukewarm about the holiday. The spooky decor actually scares me, and Amelia always feels objectified when I dress her up in embarrassing costumes, though I still do it because, well, she's just too entertaining for me not to. The one redeeming thing about the holiday is homemade candy. And it should come as no surprise that my ultimate favorite is homemade peanut butter cups. MAKES 9
1/2 cup unsalted or salted creamy peanut butter
2 tablespoons confectioners' sugar
Sea salt
1 cup cocoa powder
1/2 cup coconut oil, melted and warm
1/3 cup maple syrup
11/2 teaspoons vanilla extract
Note: I recommend using natural peanut butter because the flavor is far superior and it contains no sugar. Just be sure to give it a good stir so the oil that resides on the top is reincorporated.
Tip: Since this recipe contains no stabilizers for the chocolate, if the peanut butter cups are kept at room temperature for too long, they'll melt, so just be sure to keep them in the refrigerator until serving.
1 Place liners into 9 muffin cups. In a small bowl, add the peanut butter and the confectioners' sugar. Using a hand mixer with the whisk attachment, beat until light, fluffy, and completely combined. If using unsalted peanut butter, add a few pinches of sea salt to taste (I like Maldon).
2 In a medium bowl, combine the cocoa powder, coconut oil, maple syrup, and vanilla extract. Stir until very smooth.
3 Spoon 1 tablespoon of chocolate mixture into each liner. Smack the muffin tin on the counter to even out the chocolate. Transfer to the freezer for 5 minutes, or until the chocolate is firm.
4 Remove the muffin tin from the freezer and add 1 to 2 teaspoons of peanut butter mixture to each cup. Top with 1 to 2 additional tablespoons of chocolate and place in the freezer for 5 to 10 minutes, or until firm. Transfer to the refrigerator to thaw for about 30 minutes. Store in the refrigerator until ready to serve. When it's time to serve, sprinkle a pinch of sea salt atop each peanut butter cup.